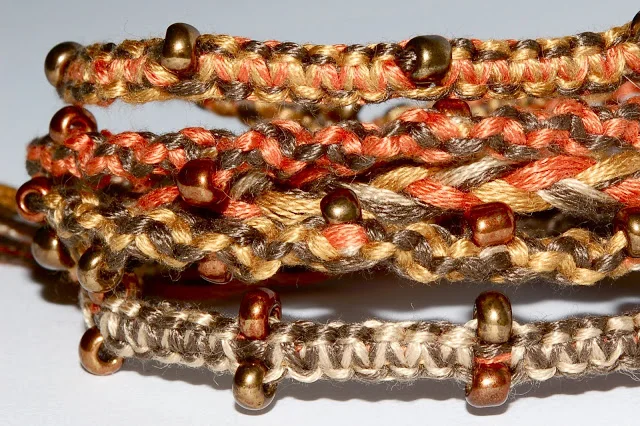
Macrame Bracelet Tutorial

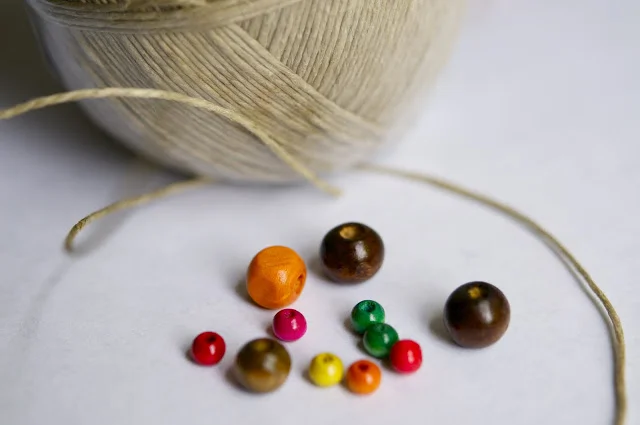
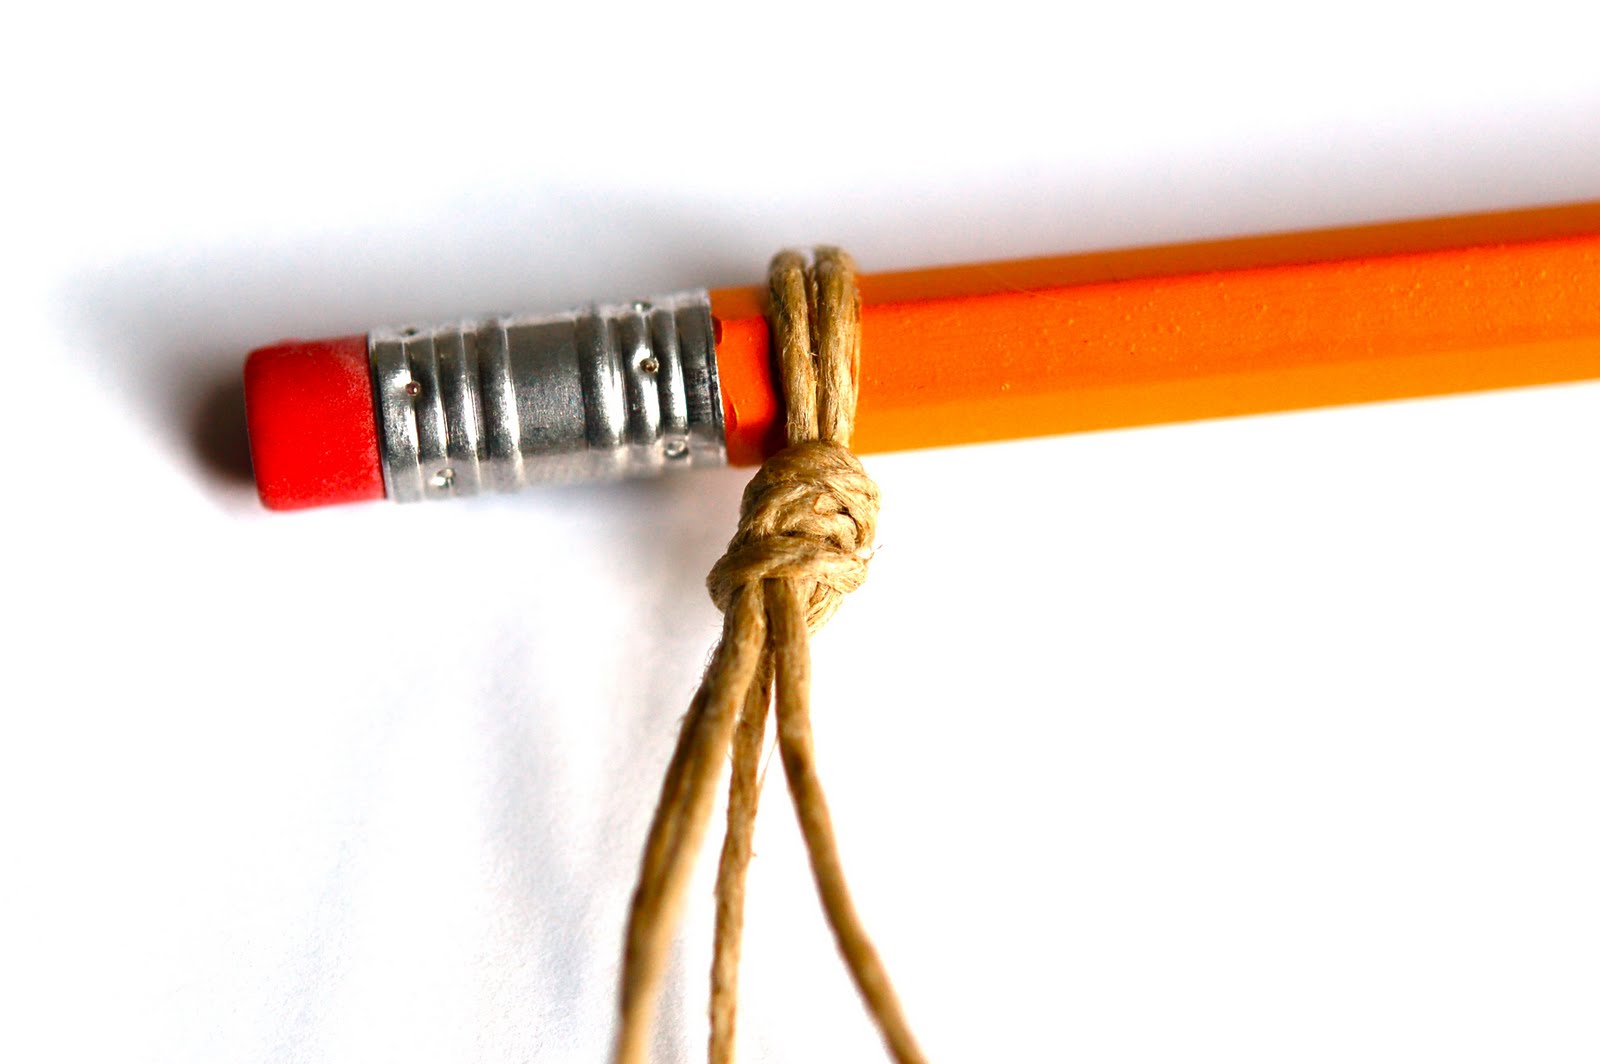
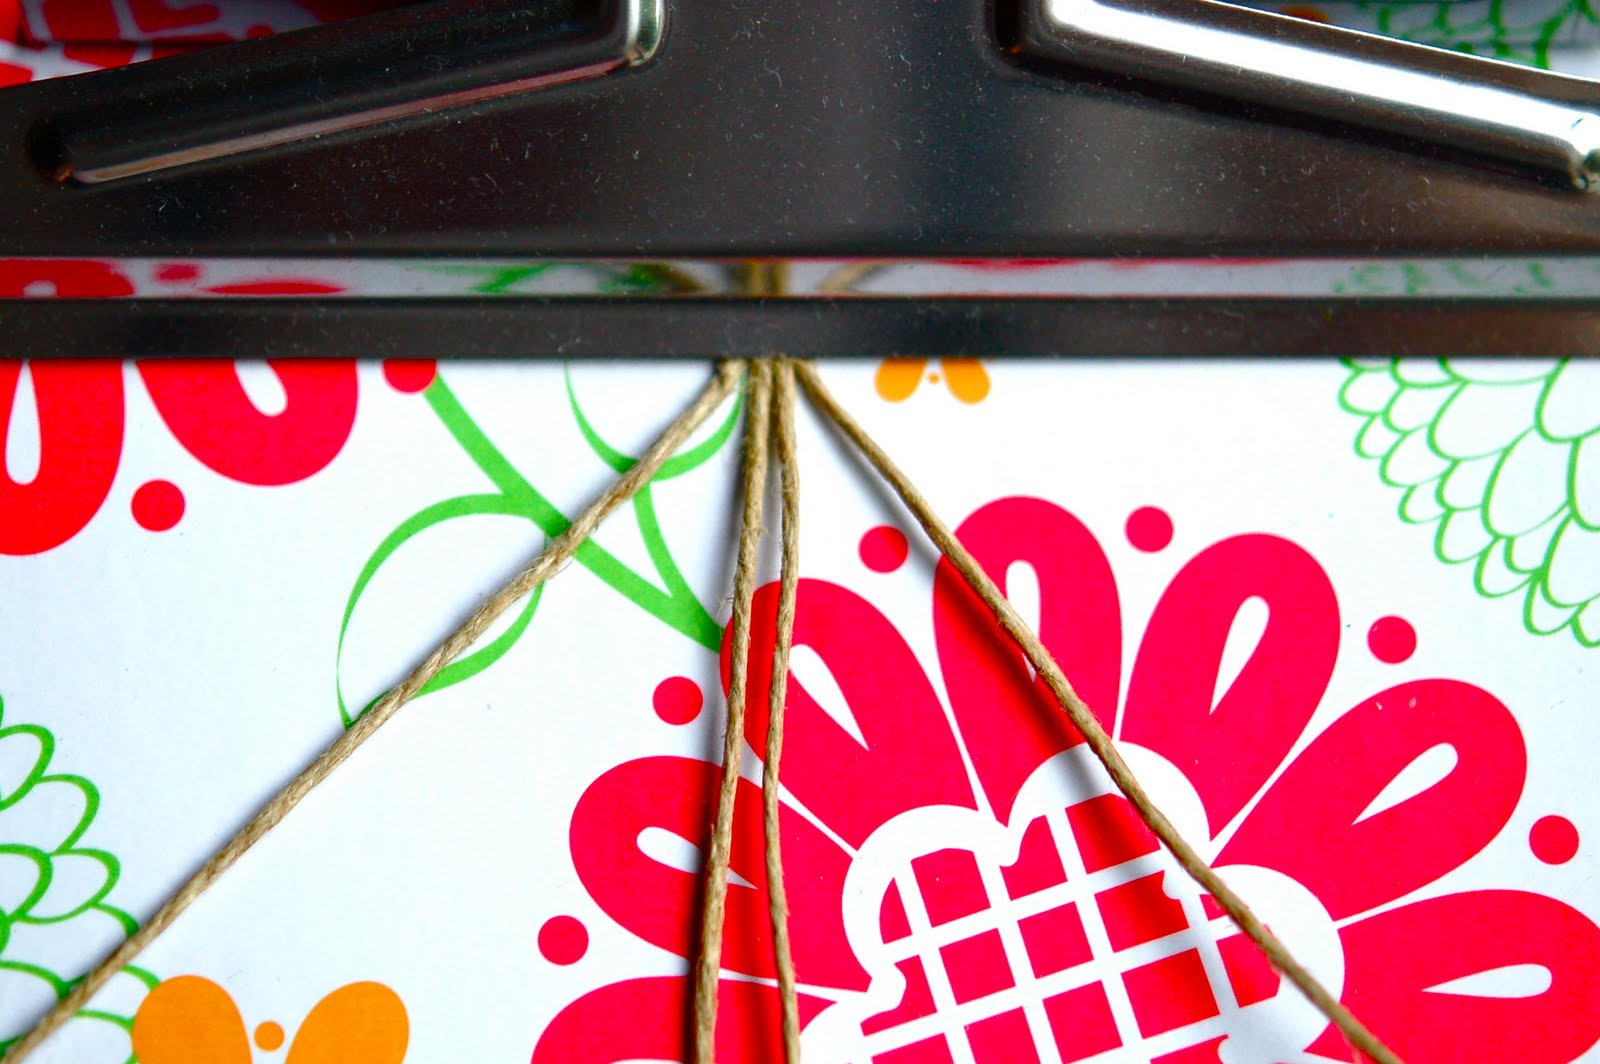
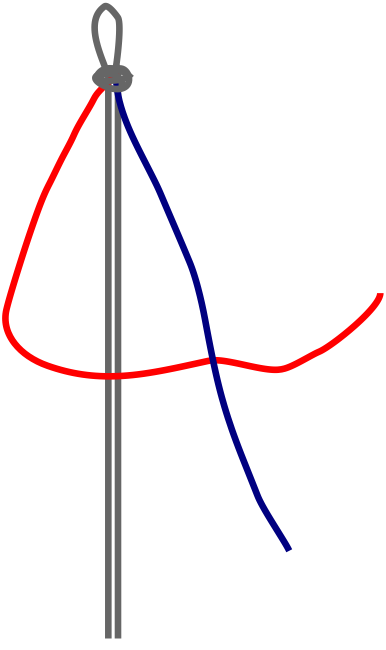
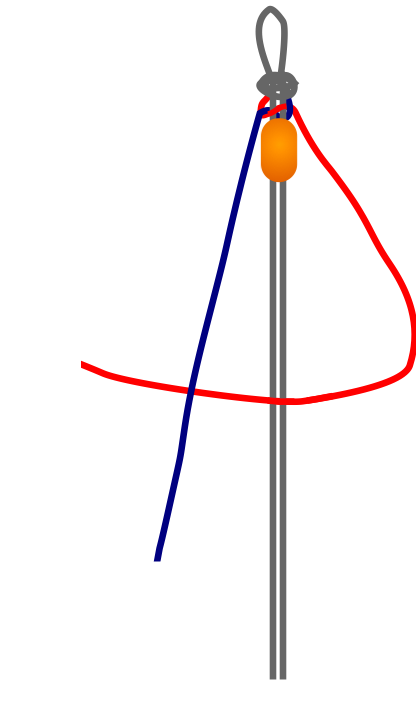
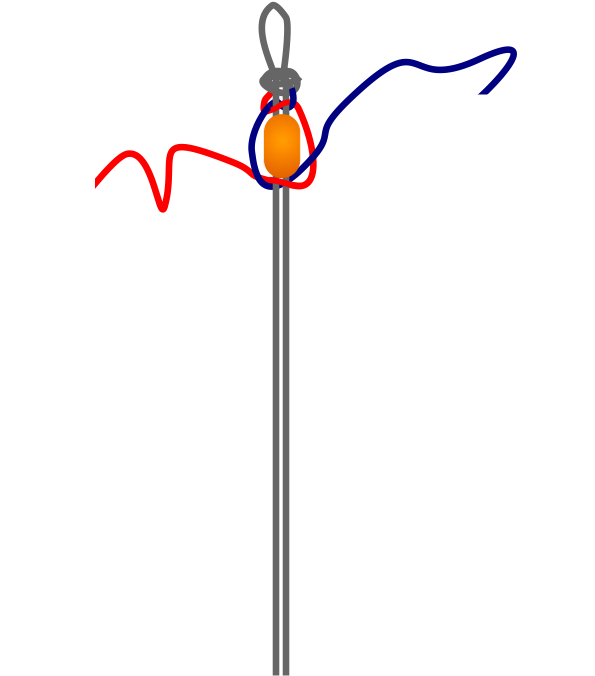
This is a fun summer, rainy day or camp activity that each participant can individualize. If you are planning a craft for a large group, this one is ridiculously economical. Supplies for 200 girls were just about $50. That's hard to beat.Supplies:HempBeads (I love wooden beads for this)ScissorsPacking Tape, Safety Pin or ClipboardPencilSetting Started:Cut 2 lengths of hemp, each 2 yards long. With both strands together, find the middle of the strands and loop together on one end, while gathering the four cut ends together on the other. Tie a knot at the looped end. This will be part of the closure for the bracelet. It's very hard, if not impossible to correct a loop that is too big when your bracelet is finished. I've found the perfect loop fits around a pencil.


Finishing the Bracelet:When your bracelet is the desired length, tie a knot close to the woven hemp that includes all four strands. Test the knot through the loop on the other end. If the knot is too small, tie another knot directly on top of the first knot to make it bigger. Usually, two knots are just right. Trim off the extra hemp strands and you're done!UPDATE: For a different closure see the How-To at the end of my Grown-Up Friendship Bracelets post HERE. The hemp will be stiff and a little scratchy at first, but it will soften up as it's worn. Once you are comfortable with the basic knot you can experiment with different techniques.

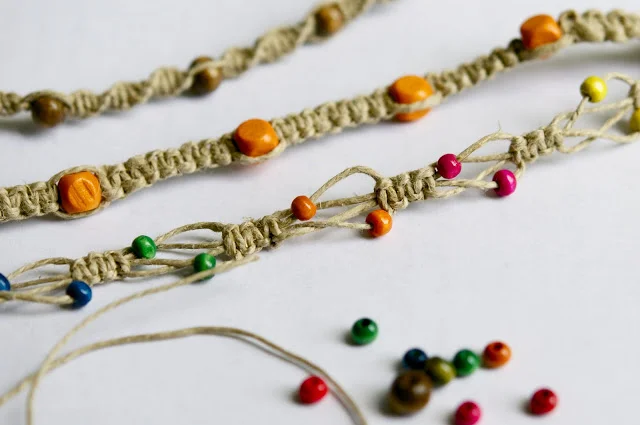
To make this spiral bracelet, simply start on the left side with a half-knot and continue making half-knots with the left strand until you reach your desired length.
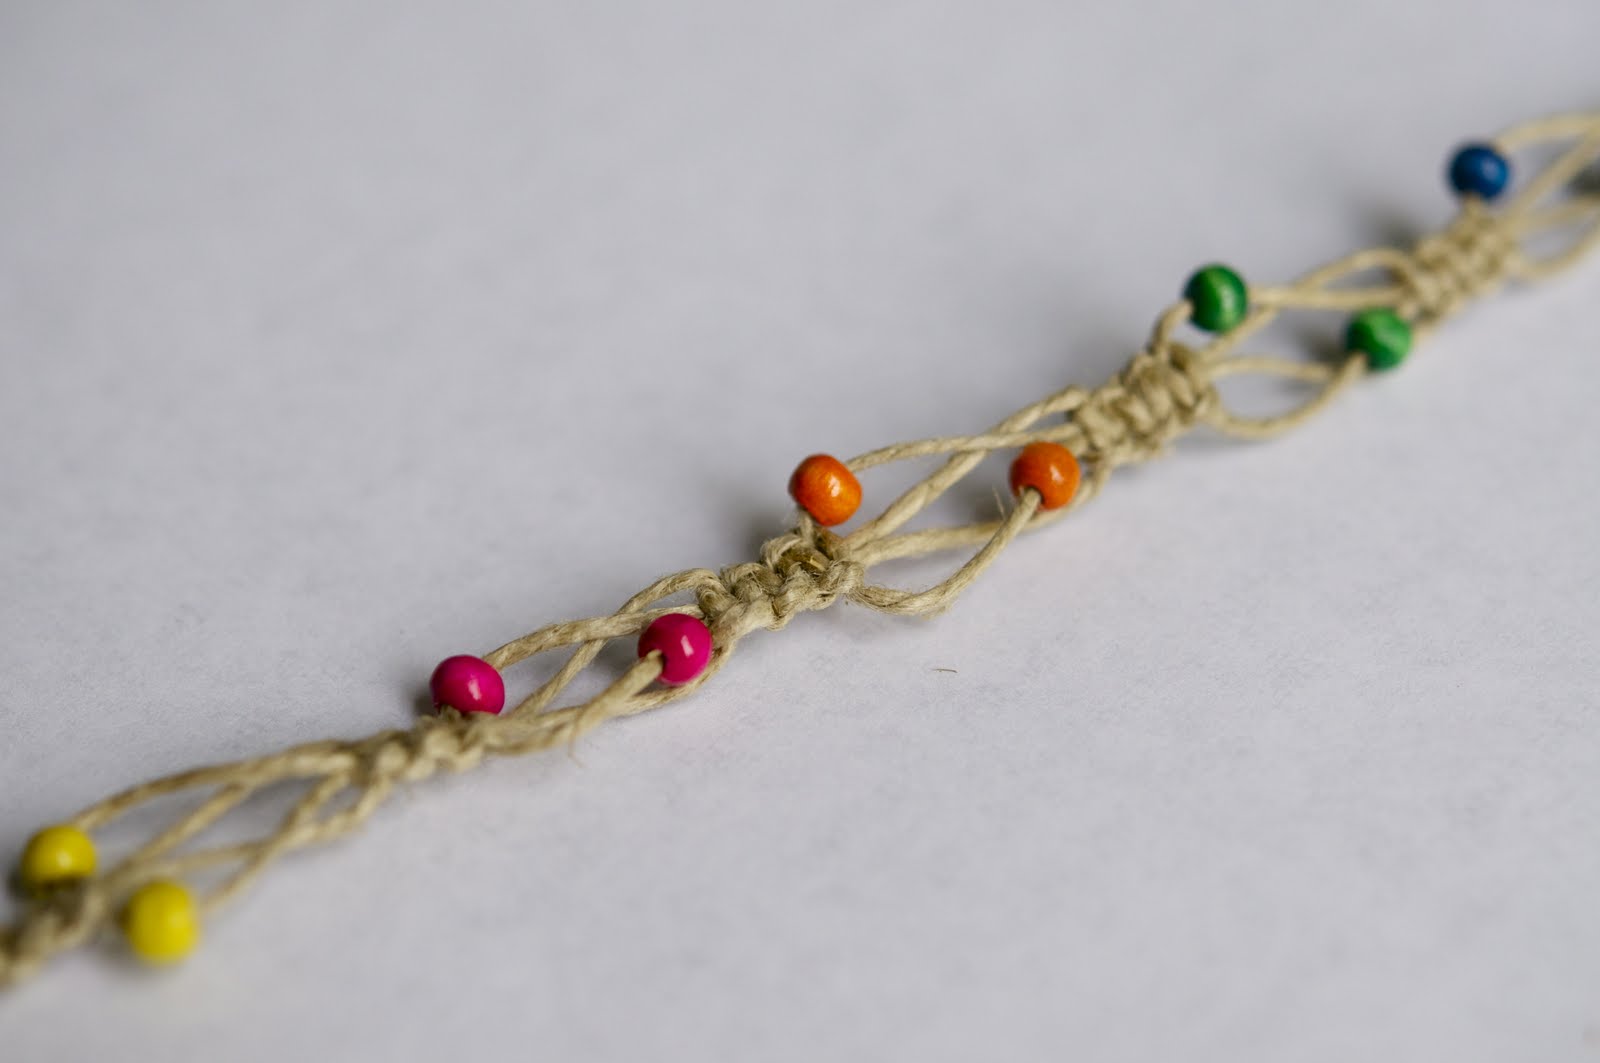
This bracelet uses a switchback technique. String a small bead on each of the two outside strands. Then, bring the two outside strands together (they will now be your filler strands) and from behind, pull one filler strand to the left and the other to the right, making them the outside strands. Starting on the LEFT, tie a half-knot, but don't pull completely tight. Leave it loose about a half an inch, then take the RIGHT strand and complete the knot pulling tight. Make a few knots between each switchback to help keep its shape.The possibilities are up to you. Enjoy!