Pinwheel Quilt Tutorial

Pinwheel, Whirligig, whatever you want to call it, this is my favorite quilt to make! What I like most about this particular pinwheel pattern is that I don't have center points to worry about. It may have a little extra trimming, but that just makes it easier to square up.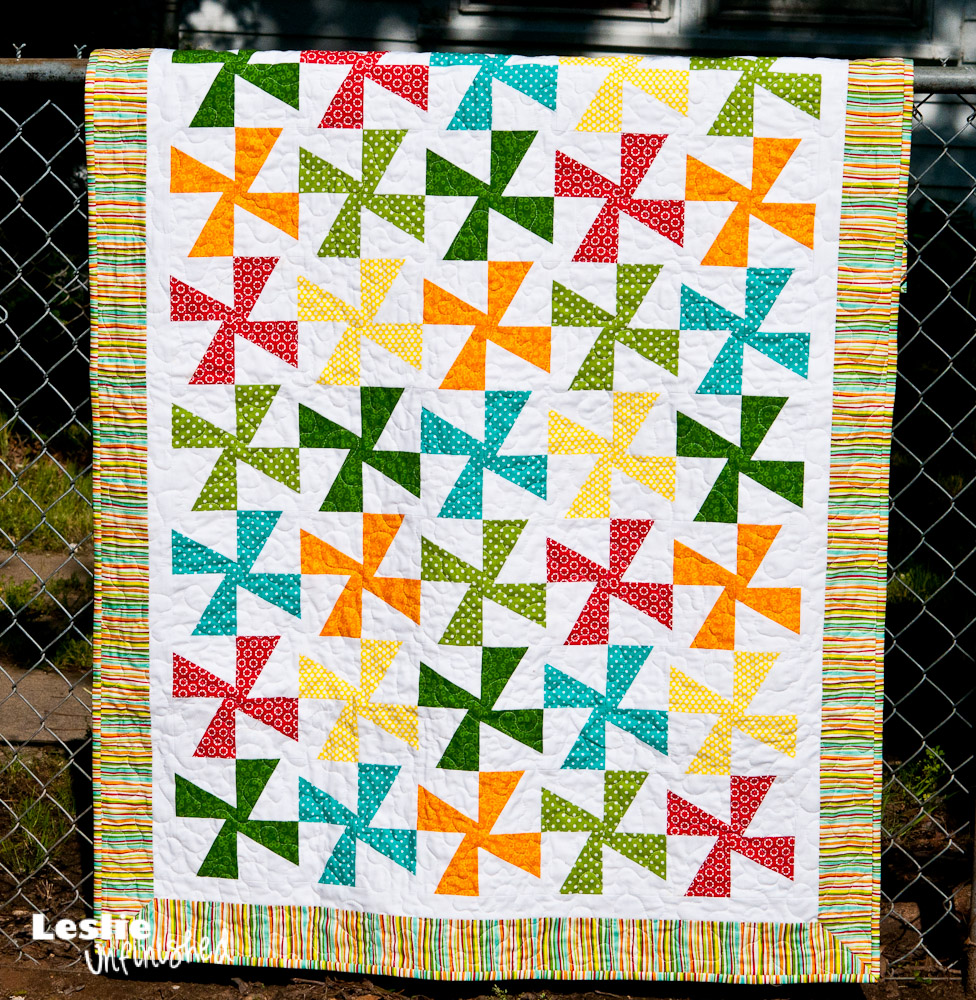
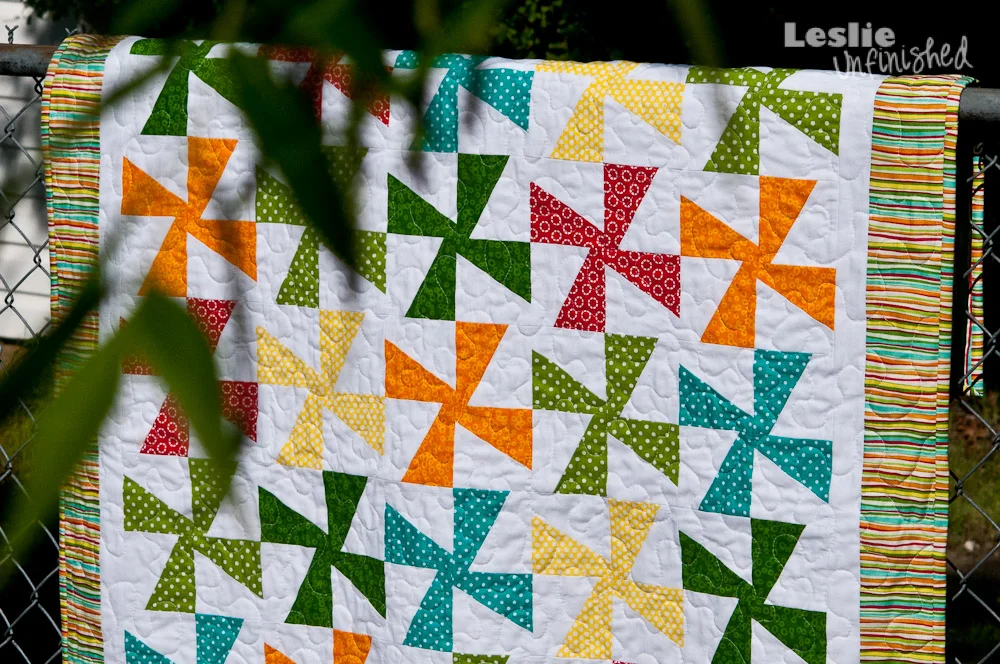
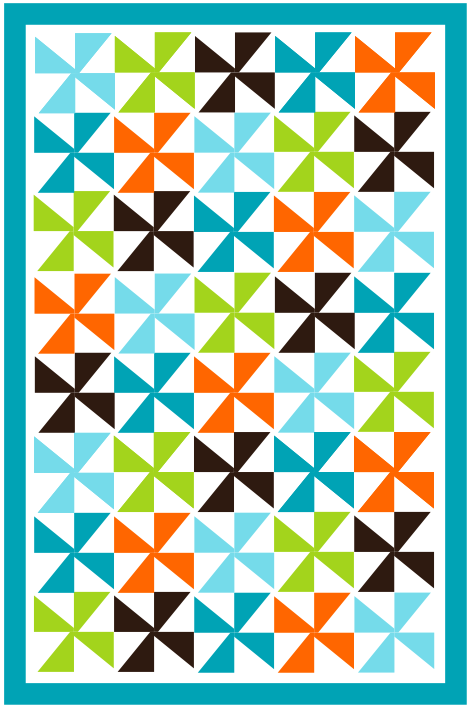
| Baby Wyatt's Pinwheel Quilt |
Quilt Dimensions: approximately 40.5" x 60"
- Cut 2 strips @ 4.5" x WOF (Width of Fabric). Then, cut into 16 squares @ 4.5" x 4.5".
- Cut 2 strips @ 4.5" x WOF. Then, cut into 16 squares @ 4.5" x 4.5".
- Cut 2 strips @ 4.5" x WOF. Then, cut into 16 squares @ 4.5" x 4.5".
- Cut 2 strips @ 4.5" x WOF. Then, cut into 16 squares @ 4.5" x 4.5";
- Cut 6 strips @ 4" x WOF. Trim off selvages; and
- Cut 5 strips @ 2.5" x WOF. Trim off selvages.
- Cut backing first at 64"; then
- Cut 2 strips @ 4.5" x WOF. Then, cut into 16 squares @ 4.5" x 4.5.
- Cut 9 strips @ 4.5" x WOF. Then, cut into 80 squares @ 4.5" x 4.5; and
- Cut 5 strips @ 1.5" x WOF.
Making the Pinwheel Template: Cut a 4.5" x 4.5" square from a piece of paper or card stock. I like a sharper angle than some of the other patterns out there, so I measure and mark one-inch from the top left-hand corner and one-inch from the bottom right-hand corner. Draw a line connecting the two marks you just made.
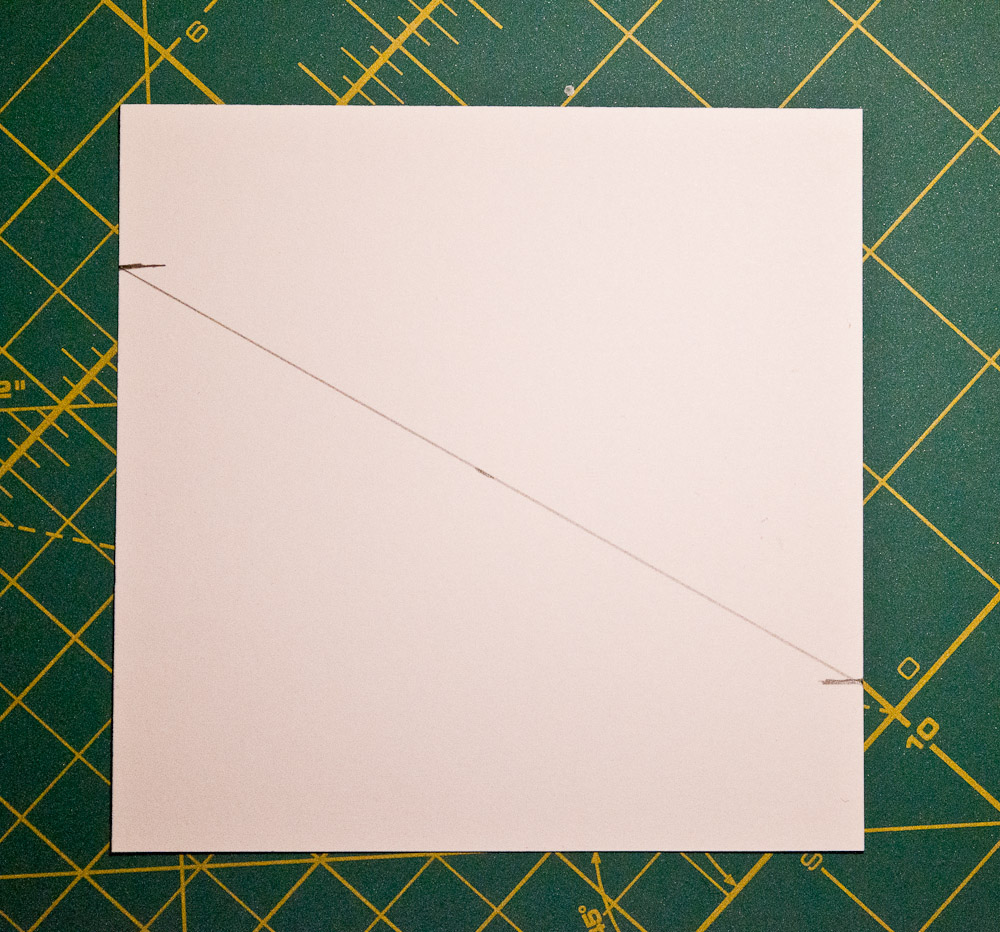
Then, using a ruler and rotary cutter, cut along the line. This is your pinwheel template.

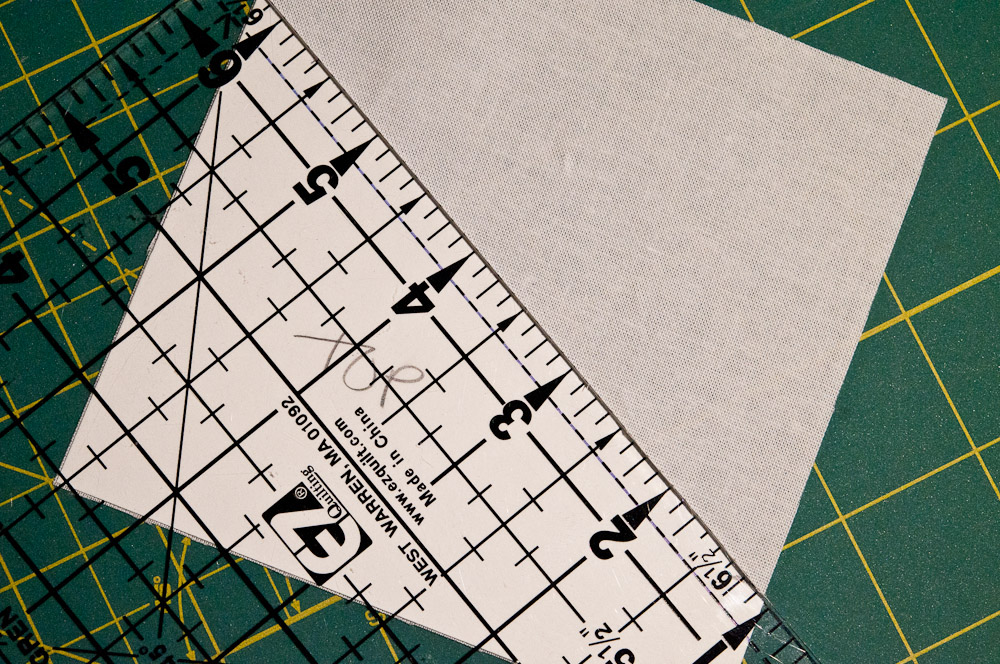
Using your ruler, draw a line one quarter-inch from the edge of the long, angled side and write TOP on your template. IMPORTANT: Always cut your fabric with the template TOP side up.

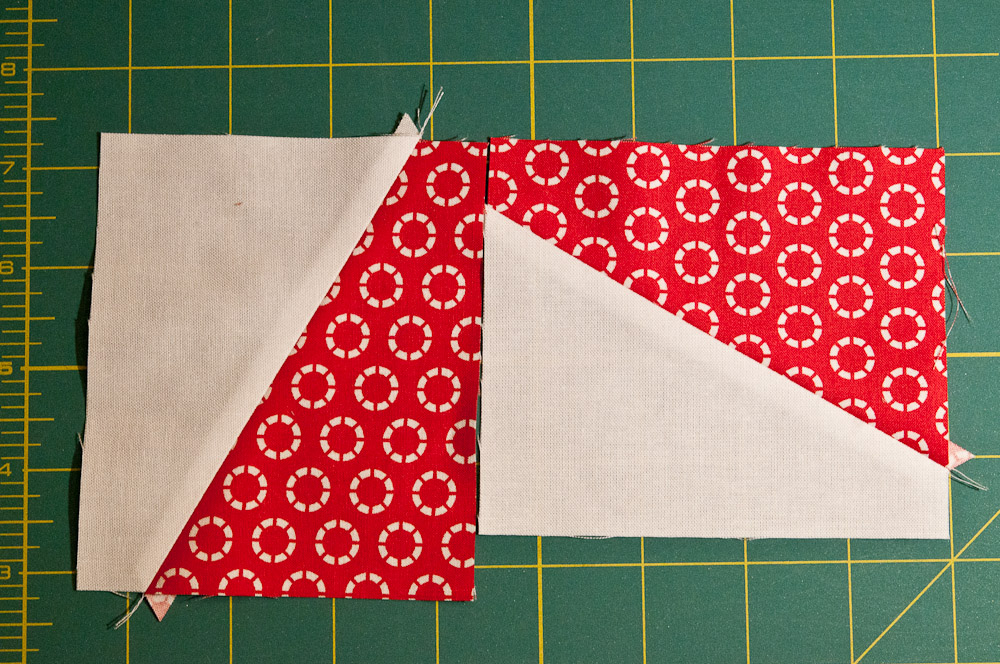
Cutting Your Fabric:To make 1 block, it takes 2 of the pinwheel squares and 2 of the background squares that you cut above. Cutting can be somewhat of a long process. I usually only cut one square at a time to keep them accurate. If you cut two squares at a time, both fabric squares MUST be RIGHT SIDE up. If not, you'll cut pieces that are backwards. Do NOT cut right sides together.Line your template along the bottom of a square as shown below. Line the quarter-inch marking on the ruler with the line you drew on your template. (By using the line as your guide and not the end of your template, you help ensure that you won't whittle away your template during the cutting process. Thus, keeping the original template dimensions.)Cut along the ruler's edge and repeat with all of your pinwheel and background squares.


Using a quarter-inch seam, sew each pinwheel piece to a white background piece. (Use a quarter-inch foot with a guide to help keep your seams even. It's an amazing tool!)

Don't cut your threads between sewing pieces together. Simply pull back and sew the next two pieces together creating a chain. It's a real time saver.


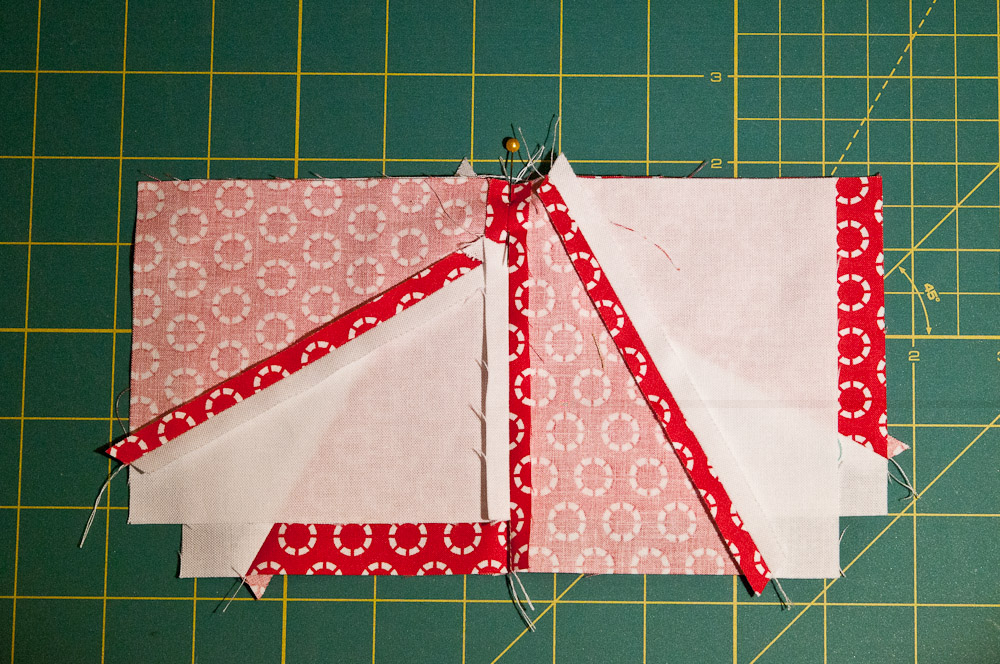

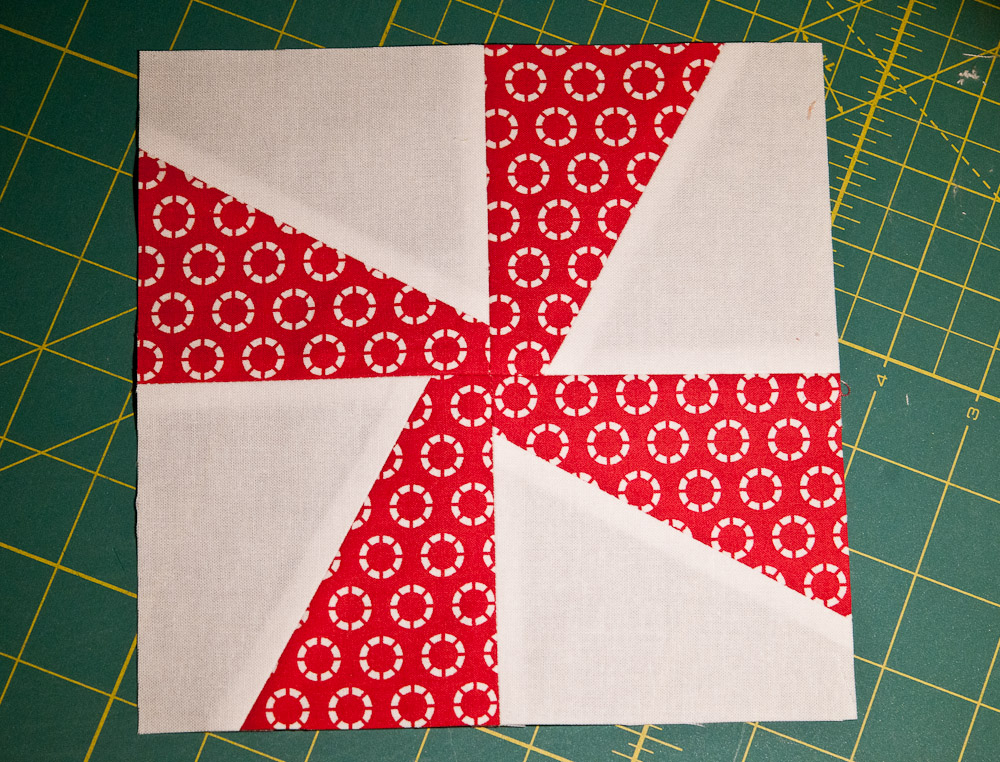
Your block is complete!
Sewing the Blocks Together:Determine the layout of your quilt. I like planned randomness. I color code my fabrics with no same fabrics together. It all makes sense in my head and looks something like this:
 |
| Example layout |
Following your layout, you're going to sew 8 rows of 5 blocks, making sure to match center seams, just as you matched the centers of your pinwheels. When your rows are complete, press seams open.Next, sew the rows together taking care to line up your seams. Pin at both the center seam of the block as well as at the side seams. Sew in place and press seams open.
The sashing is the small white strip around the sewn blocks.
- Take three sashing strips and sew the the ends together following steps 4 through 8 of this tutorial. Then, cut in half so that you have two long strips. Sew one strip to each side of the quilt-top lengthwise. Press seams open and trim.
- Take the two remaining cut sashing strips and sew one along the top and the other along the bottom. Press seams open.
- If you are piecing your border, sew 5 border strips together as you did with the sashing, above. Cut in half so you have two long pieces. Sew one strip to each side of the quilt. Press seams open and trim as needed.
- Sew remaining strips to top and bottom. Press seams open and trim.
 |

Please feel free to leave any questions you may have in Comments. Happy sewing!