Flannel Blanket with Handmade Piping Tutorial

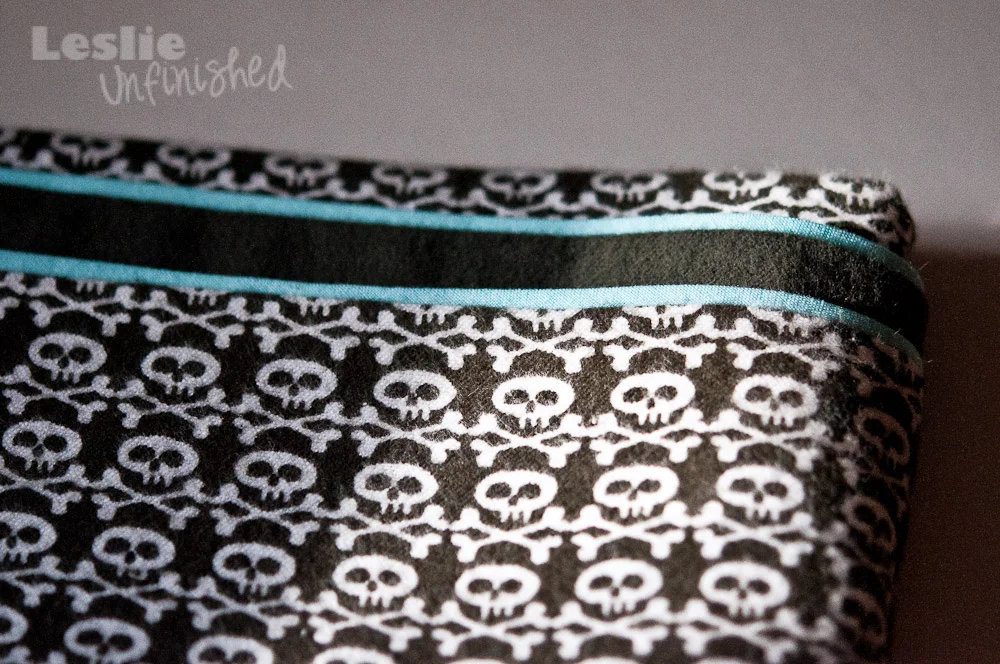
I found this cute skull flannel for a blanket for a friend's new grandson. But, since charcoal grey can be awfully dark for a baby, I wanted to add just a bit of color to brighten it up. Since I'm also making him a quilt to match his crib bedding, I added a light blue piping to the blanket. Unfortunately, I wanted an aqua blue and not a baby blue, which was all I could find pre-made. Luckily, it was easy to make my own!
FABRIC NEEDS:
- One and two-third yards EACH of top flannel fabric and coordinating backing.
- Three-fouths of a yard binding fabric. (I used 100% Kona Cotton)
Finished blanket is approximately 40"x 58".
***PRE-WASH ALL FABRICS***
Cutting the Blanket:
1. I always cut my flannel blankets RIGHT sides together. That's how they'll be sewn, so just in case something isn't quite straight, at least both pieces will match. Simply smooth both pieces together and cut all sides in a straight line. You just want all sides straight and corners squared.
2. To make it easier on myself when I attached the piping, I rounded the corners. Simply fold the corner of a piece of paper and cut your desired curve. Pin to both pieces of fabric and cut.

Making the Piping:
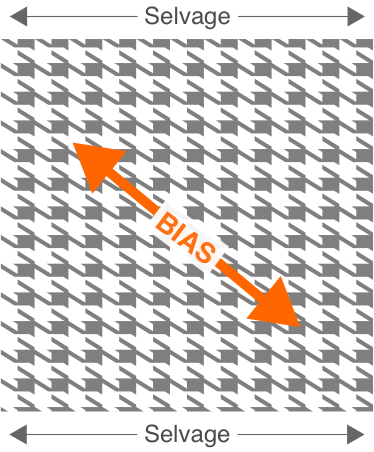
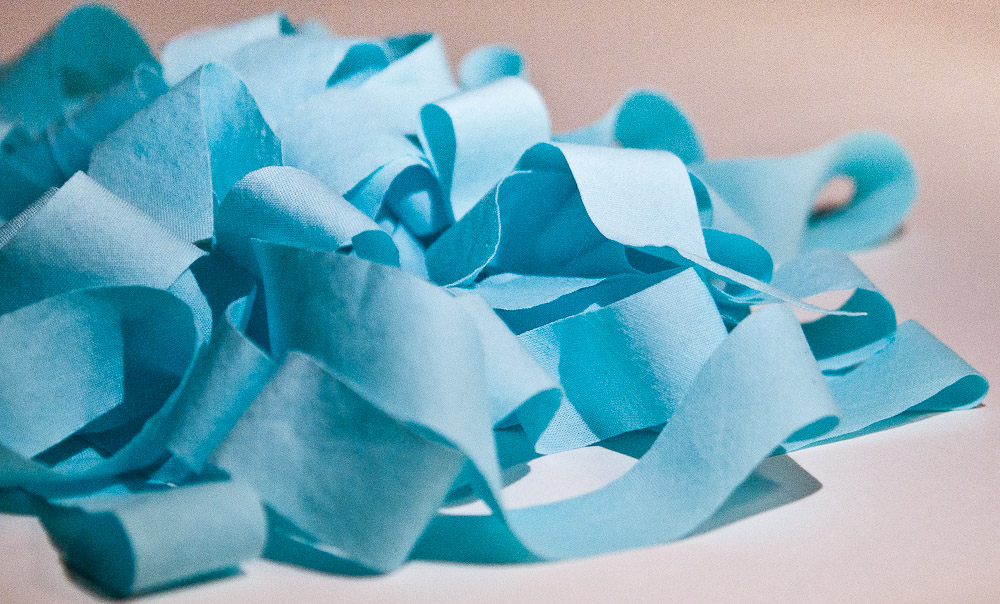
Typically, a piping would have an inner cord. But, because of how I used it, I omitted the inside cord. For smaller projects, I've cut piping on the grain, but because this one needs to be sewn on a curve, it needs to be cut on the bias.
The bias is simply the cross-grain of your fabric.
1. Calculate the perimeter of the blanket to determine how many strips you'll need to cut. Mine is crib-sized (40" x 60") so that's 200 inches around. I cut my piping from a 1 yard piece of fabric so I would have long strips instead of a lot of short ones to piece together. I had to buy a little more fabric to get the longer lengths, but the extra fabric won't go to waste.
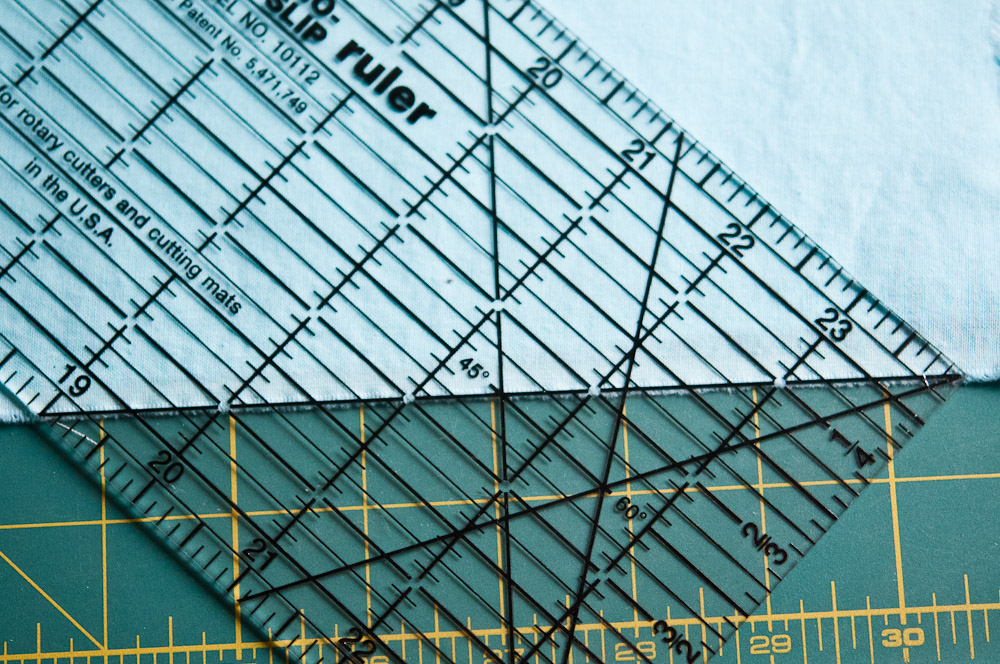
2. Open your fabric and lay it out (single layer) with selvages on the top and bottom as shown in the graphic above. Using your ruler, line up the 45 degree marking on the edge (the selvage) of your fabric. (If you don't have a cutting ruler and rotary cutter, mark lines with a yard stick or tape measure.)

3. Cut multiple 1-inch strips. I used approximately 8-9 strips.
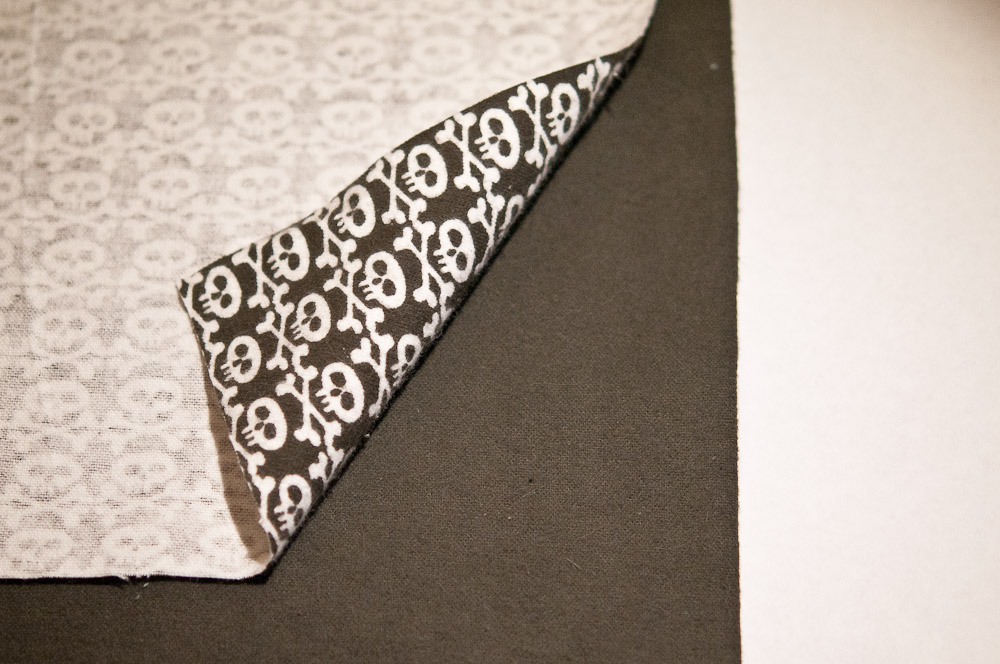
4. Trim both ends of each strip so that they are square. Lay two strips RIGHT sides together as shown below.
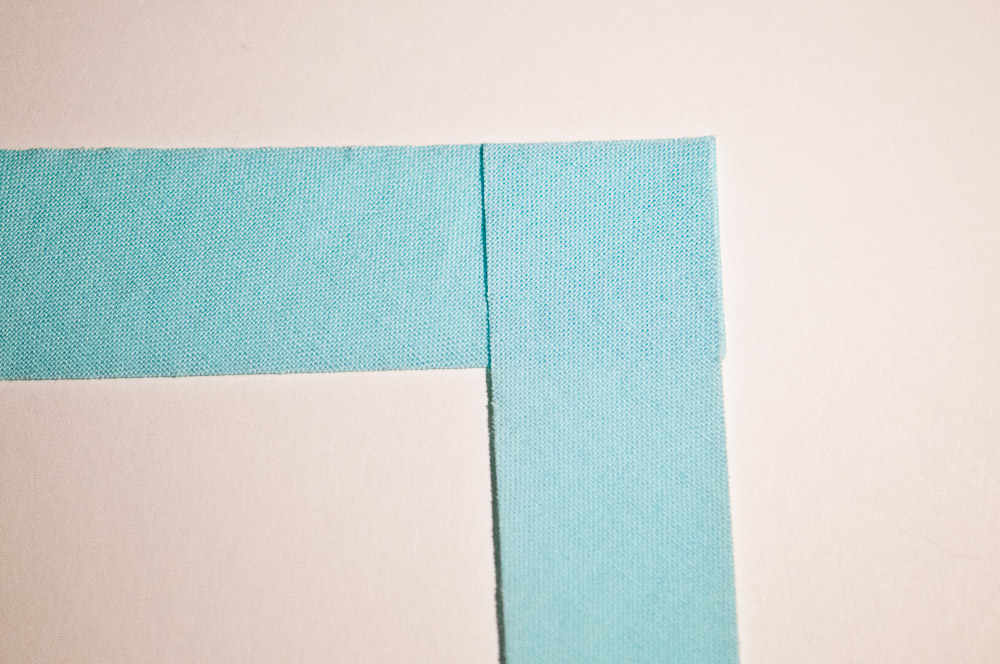
5. Line up your ruler creating a 45 degree angle that goes from the corner of the top strip down to the corner of the strip underneath.

6. Mark along the ruler's edge. This is the line you are going to sew on.

7. Pin in place if necessary, transfer to your machine and stitch in place. Trim excess corner leaving a one-quarter inch seam allowance.

8. Repeat, sewing the next strip onto the one you just created, always putting RIGHT sides together. After all strips are sewn together, press all seams to the side.

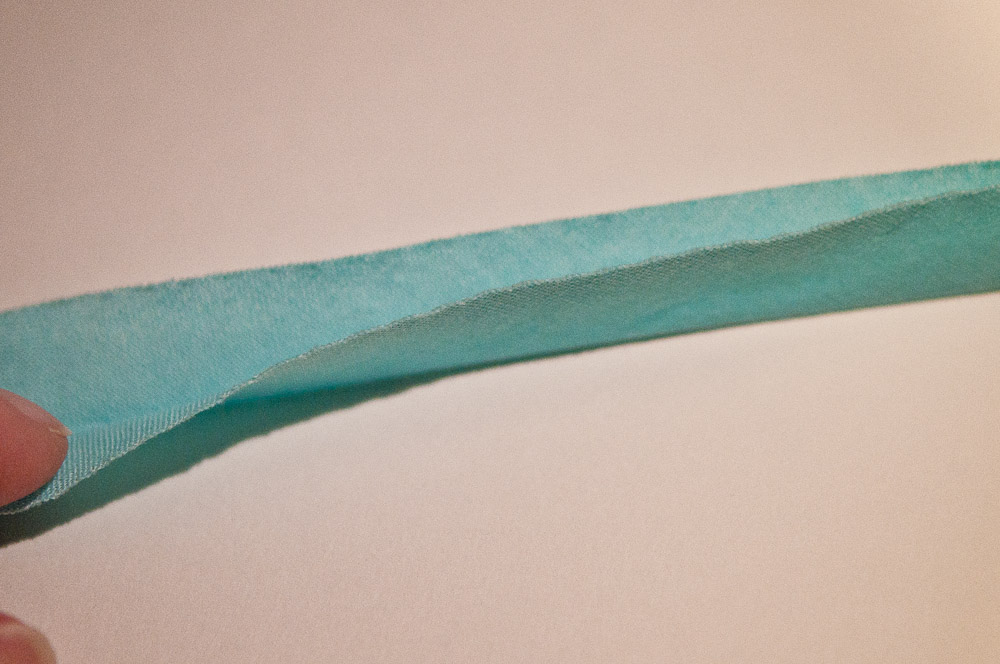
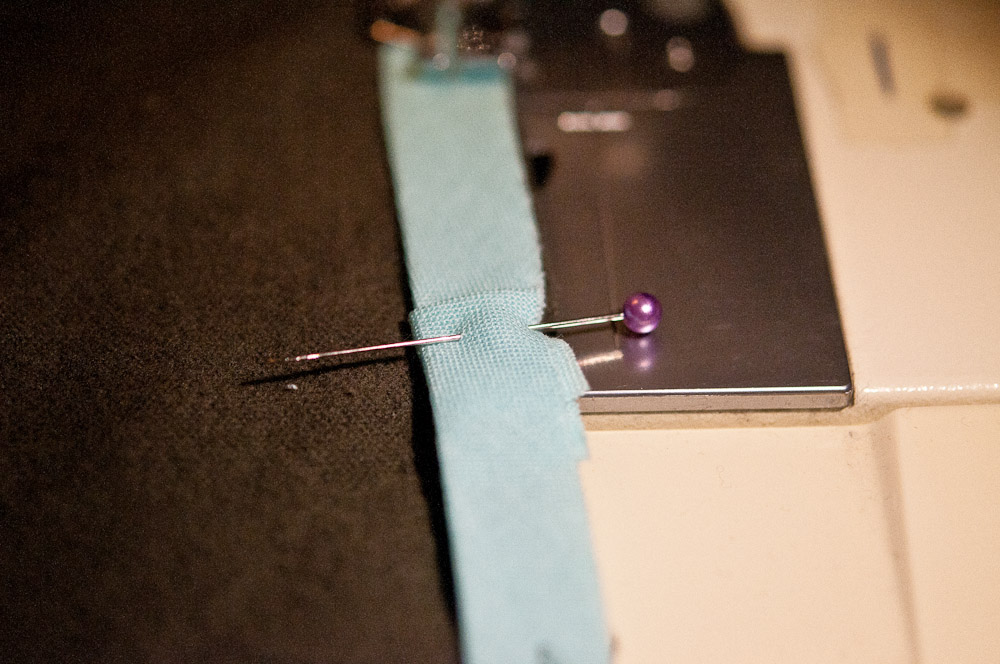
9. With WRONG sides together, fold strip lengthwise on itself with raw edges together, and press. You're now ready to sew it to your blanket!
Attaching the Piping to Your Blanket:
1. Working with one layer of the blanket (I'm using the bottom layer) line up piping (raw edges to raw edge) and pin to the blanket. Leaving about 4 inches of the piping unattached, baste piping all around the bottom layer and stop several inches from your starting point. I used a one-quarter inch seam allowance.

2. Back at the starting point, turn 1-inch of the piping and pin in place. This will give us a finished edge.

3. Lay the piping from your stopping point over the starting point binding. Trim as needed so that you only have about one-half inch overlapping.

4. Fold over the turned back piping and secure. (The end of the piping in nestled inside.) Finish basting piping to bottom layer of blanket.
5. With RIGHT sides together, pin bottom layer and top layer together. The piping will be between the two layers.
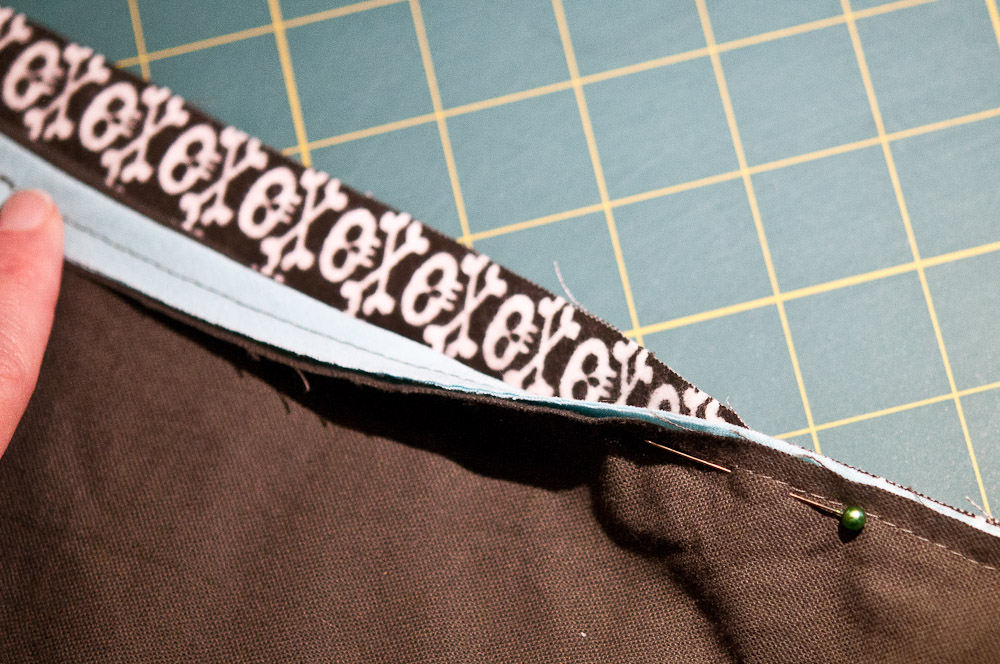
6. Sewing directly on the basted line or just to the left of it, stitch layers together but leave a gap of 8 inches un-sewn. This will allow us to turn the blanket right side out. Because of the machine foot I used, it was easy for me to sew just to the left of my basting stitch and make my seam allowance just a little bit bigger.

7. Remove blanket from machine and carefully clip the curved edges.
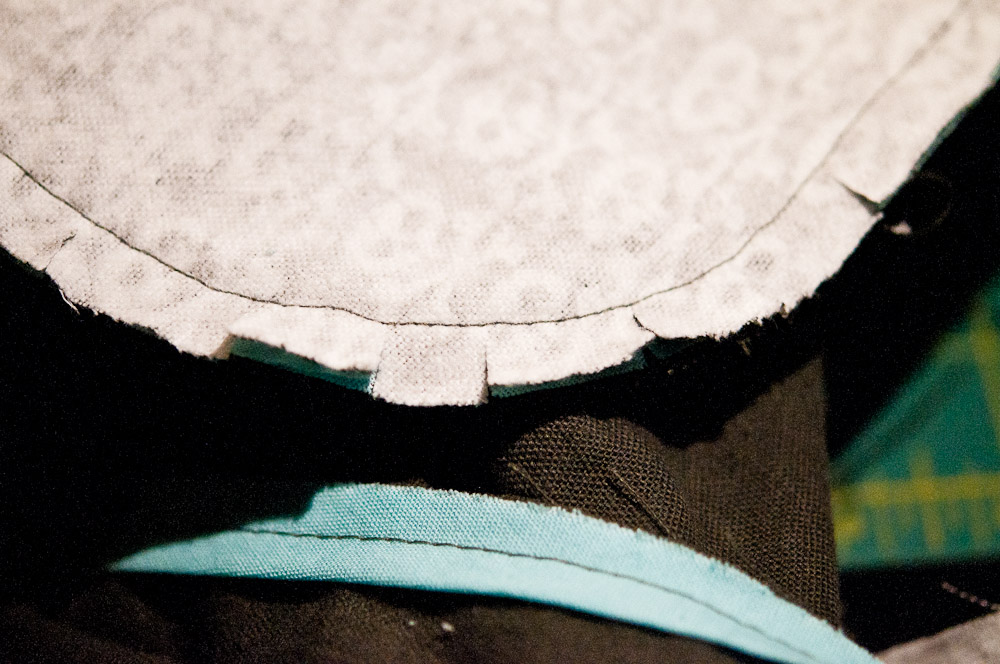
8. Through the un-sewn gap, turn RIGHT side out using your fingers to smooth out sides and curves.

9. Don't underestimate a good pressing. Take your time and press all around the blanket paying attention to the un-stitched gap. Press it straight, pin in place, then stitch by hand.

That's it! The blanket is complete and ready to be used!