Receiving Blanket with Ric-Rac Edge Tutorial
I love flannel receiving blankets! They used to be my go-to baby gift before I became obsessed discovered quilting. This one was for a Baby Shower I was going to and the new parents decided they didn't want to know if it was a boy or a girl until it was born. I had no idea it would be so difficult to find fabric that was gender-neutral!
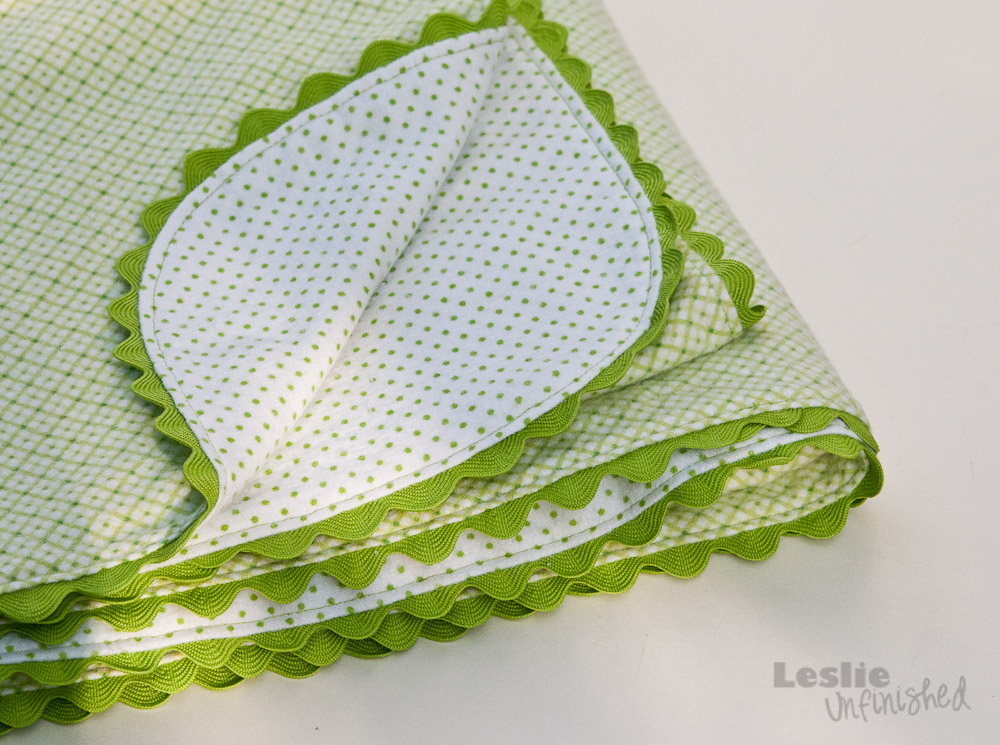
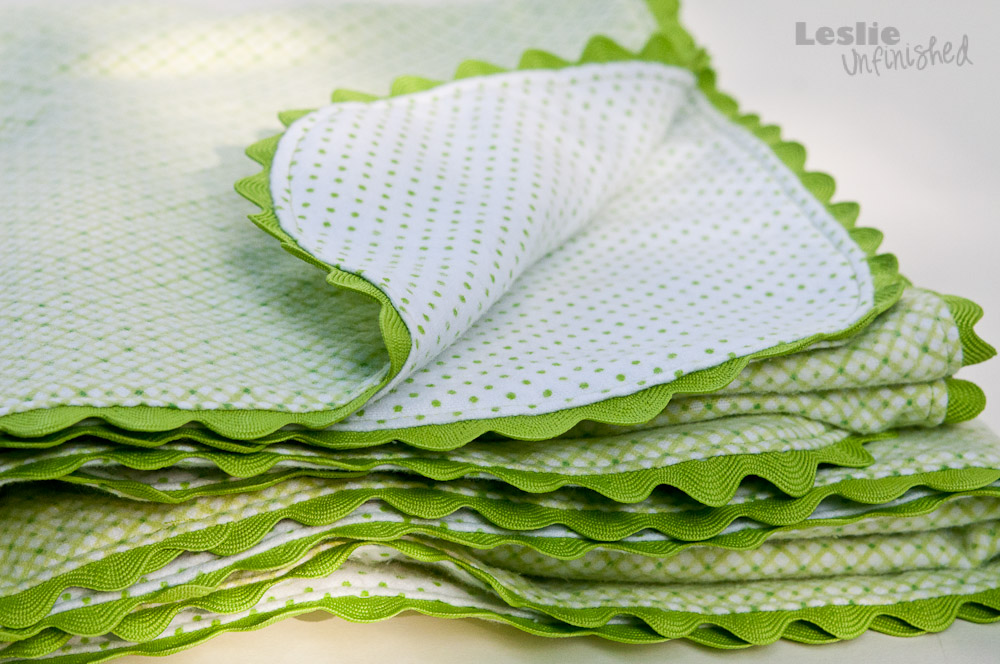
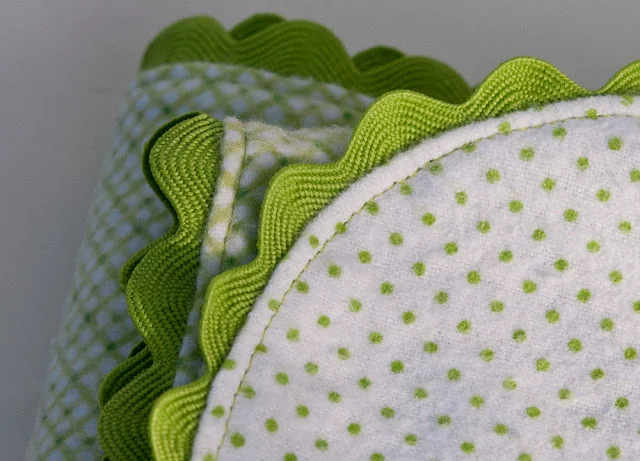
I finally found this great lime green plaid and coordinating dot and decided to add a large ric-rac to the edge. The ric-rac really made it a little more "special" instead of just being a plain 'ol blanket.
In case you'd like to make one too, here's what I did and what you need.

SUPPLIES:
- 1 1/4 yd. flannel
- 1 1/4 yd. coordinating flannel
- 2 pkgs. Ric-Rac (can be coordinating or contrasting)
PREPARE THE FABRIC:
- Pre-wash, tumble dry and iron your fabrics.
- With RIGHT sides together, lay fabrics out flat lining up selvages and raw ends. Trim off selvages and even out ends to form a rectangle.
- Still with RIGHT sides together, cut the corners into a curve. (Simply fold the corner of a piece of paper and cut your desired curve. Pin to both pieced of fabric and cut.)

ATTACH THE RIC-RAC:
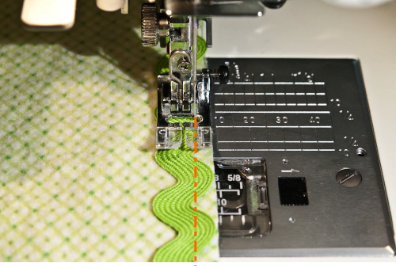
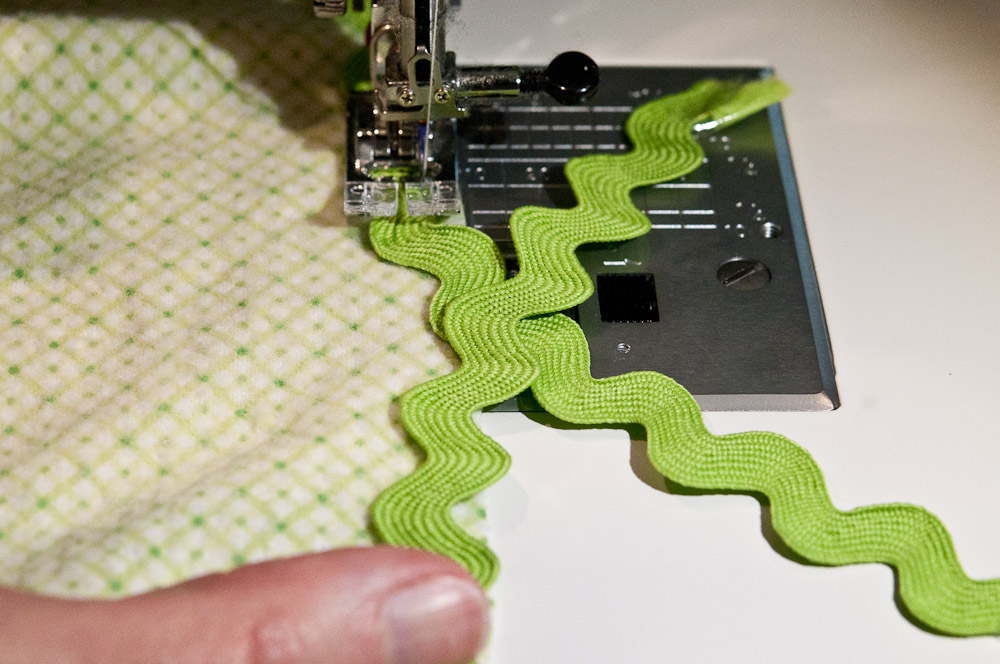
- Working with only one layer RIGHT side up, lay the ric-rac along the edge of the fabric. I moved my needle to the far right (#7 position), which gave me a 1/4" seam. You want to just catch the edges of the ric-rac, but get enough of it so that it'll be sturdy and not pull out. The orange line in the photo below shows where my stitching line will be.
- Starting 3-4 inches in from the raw end of the ric-rac, stitch ric-rac to the perimeter of the fabric.
- When you come to an end, (whether it's to start a new package or to finish) angle the end off the edge of the fabric and stitch in place.

- Then angle either the start of the new package or the beginning loose end over the end you just sewed and stitch it into place as well. Trim excess. This will keep both ends from unraveling.
FINISHING:
- With RIGHT sides together, line up raw edges and pin in place.
- Adjust your needle (I moved mine to the #5 position) or align your fabric to sew a seam allowance that is just bigger than the previous 1/4" seam. Sew around the perimeter of the blanket leaving open a 6 inch gap. Don't leave your gap on a curve. Leave open along a straight side.

- Reaching through the gap you left, turn the blanket right side out and use your fingers to push out the seam and trim.
- Press seams around the entire blanked on both sides.
- At the un-sewn gap, turn raw edge under and press. Pin and hand-stitch in place.

- Top-stitch with a plain or decorative stitch. I did a simple straight stitch. I used an Open Toe Satin Stitch Foot because it fit right along the edge of the pressed seam.

Your blanket is complete!