
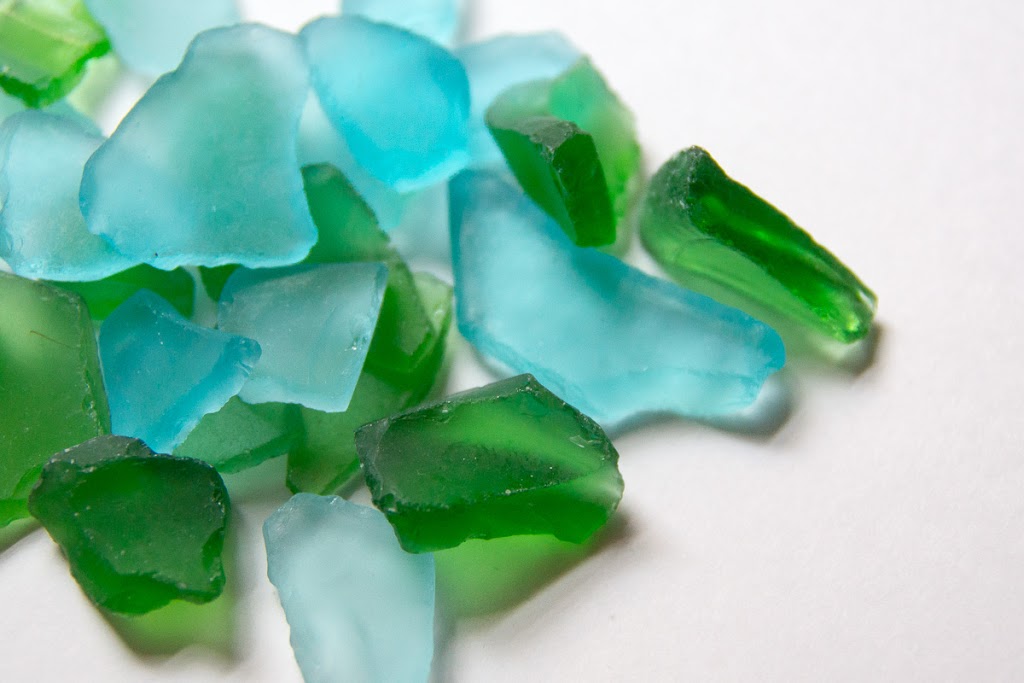
Sea Glass Votives

My modern quilt guild organizes a hand-made gift exchange every year. Since our members are ALL sewists, I like to take the opportunity to do something 'non-sew-y'. For the last exchange, I brought these Sea Glass Votives. They are a breeze to make and are so beautiful when lit up!

SUPPLIES:
- Sea Glass
- Clear Silicone Adhesive/Sealant (such as E6000)
- Glass Votives
- Grout (sanded or non-sanded grout)
- Small Rubber Spatula or plastic knife
- Disposable container for grout
- Disposable container for water
- Sponge
A few things to be aware of before you begin:
- Silicone adhesive doesn't just 'wash off' with soap and water. It lingers around. Please take care to NOT get it on your fingers. It's thick, so it isn't very messy. Use rubber gloves if you think you need them.
- The silicone adhesive dries pretty quickly. You won't be able to easily re-position your glass. Decide where you want your piece BEFORE placing adhesive on it.
- Place enough adhesive on the sea glass so that it slightly oozes out from under the glass. This will allow the entire piece of sea glass to glow.
- Make sure the oozing adhesive is NOT higher than the sea glass. If you use too much adhesive, you can slice some off with a razor blade.
INSTRUCTIONS:
- Clean votives to remove dust and dirt.
- Apply silicone adhesive to the back of piece of sea glass and adhere to votive. (Again, use enough that the silicone barely oozes out from under the sea glass.)
- Continue gluing sea glass to votive, placing pieces close together.
- Mix Grout according to directions in a disposable container. You want it thick, but spreadable.
- Using the rubber spatula or knife, spread the grout on the votive and use the spatula to push the grout down into the gaps between the sea glass. You want to keep pushing and smushing it down so that it gets into every nook and cranny around and under the glass. This helps prevent against cracking. Don't worry that the grout covers the sea glass, you'll clean it off later.
- As you continue grouting, you'll see the grout become crumbly as it dries out. As this happens, simply add more water to your mixture. Use a damp sponge to help smooth out and push the group between the gaps.
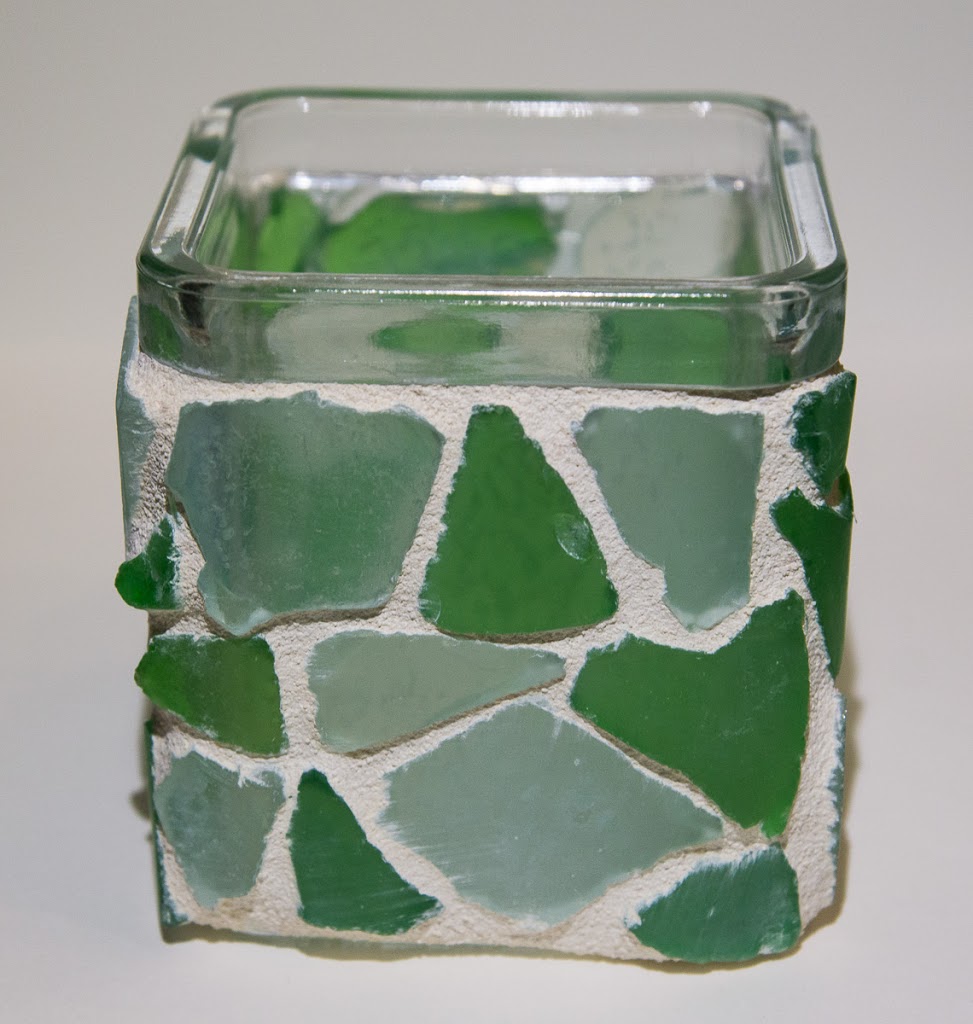
- When you are finished grouting, take a damp sponge and gently clean off the grout to expose the sea glass, rinsing the sponge clean as needed. Baby wipes also work well for this task and are disposable. The sea glass doesn't have to be perfectly clean. The chalky white residue will come off easily after the grout sets.
- When it looks clean, set it aside to dry. It'll be dry overnight! Then wipe again with a damp sponge. It is now ready for a candle and a lovely summer night!